It’s almost music festival season, Bikini Babes! Naturally, we’re starting to get excited about the line-ups, the travelling, and of course, the fashion. However, after spending money on festival tickets, hotels, and food, you might be hard-pressed to spend any extra money on the necessary festival-wear. We’re here to provide you with steps to make your staple fashion piece into an affordable DIY project.
What You’ll Need:
-
Pair of high waisted jeans
-
Box cutter or blade
-
Tweezers
-
Sander (or cheese grater if you don’t have a sander)
-
Hard surface
-
Scissors
-
Highlighter or pen
Directions:
-
Find some high waisted pants/shorts. To make sure they are high waisted, try them on and make sure the zipper is long. Make sure to not use stretchy jeans. The thicker, the better. If you want a more comfortable feel, purchase a size up. Keep in mind if you’re looking for blue jean, bleached, or acid washed styles to go with any tops or accessories to match.
-
Draw a line where you want to cut with your highlighter. The back should be longer than the front, as we don’t want too much booty to peek through. As you cut, create a very slight upward angle at the seams, near the thighs. This is not necessary, however they look a lot more flattering and create a natural distressed look.
-
Make a hole with your scissors and cut below the line you drew by approximately 1-2 centimeters. This is to ensure that you are not cutting too much and can be adjusted later. While they’re still a bit longer than we want them to be, we’re going to go ahead and distress them.
-
Take your sander or your cheese grater. Take a hard surface (frame, table, brick, etc.) and go crazy! Create a distressed look on the corners of pockets, zippers, the thighs and the booty area. With a sander, this should take approxiamtely 30 minutes.
-
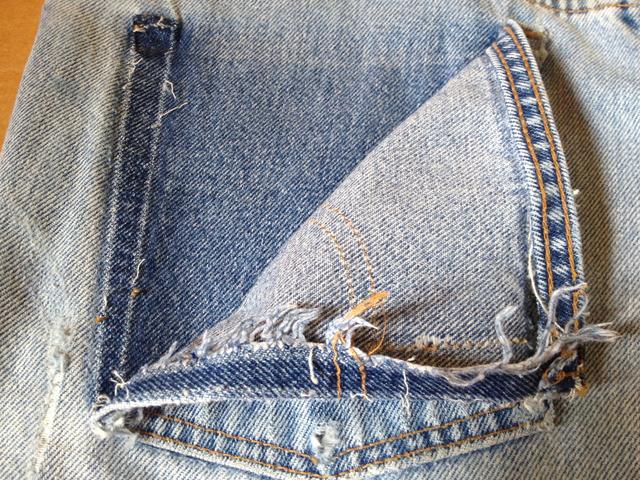
Take your box cutter and rip off one of the back pockets. Cut the threads that are holding the pocket together on one side, so that just the corner of the pocket is folded over.
-
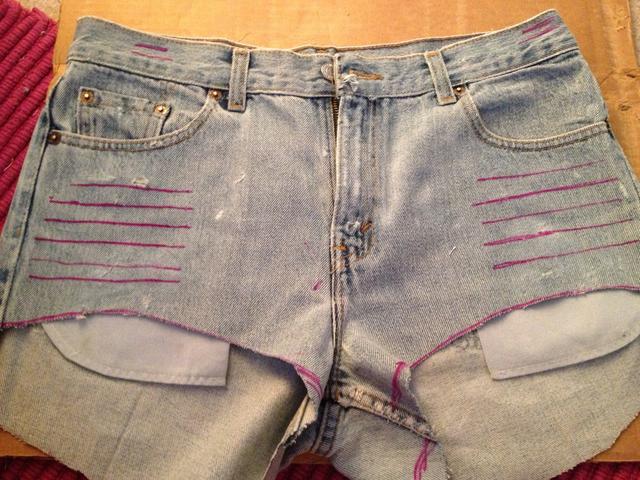
Try on your shorts and see how they fit. Determine where you want to cut more. If you want your pockets to show or want want my pockets to show or want them a bit shorter, mark it with your highlighter.
-
Now, draw 5-6 straight, horizontal lines on the jeans, located just about 1-inch below where the pockets are. These lines must be about 1 inch apart. These will be your holes, so the thicker the line the harder it is to distress them. Tip: Make sure your lines are straight! If not, your thread will not hold up and will become just large holes.
-
Add some where ever you want to cut, such as the front of the thigh or the back pocket.
-
Use your box cutter and cut on the lines you drew, remember do this with your hard surface underneath the first layer of the jeans, so you don’t cut the back part of the shorts.
-
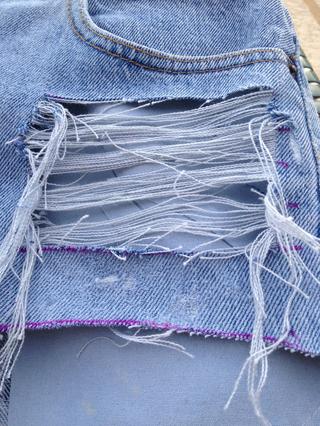
Flip them inside out and grab your tweezers.
-
Begin pulling the white threads… Make sure to get rid of the vertical, blue threads. Once some of the white threads are out of your way, pull the blue ones out completely. You only want to keep the white threads that are going horizontal. Try not to rip them, if you cut your lines straight enough then they should hold up well.
-
Distress all around the edges, just pull the threads with the tweezers or your fingers.
-
Throw them in the washer/dryer and when they come out they should look something like this:
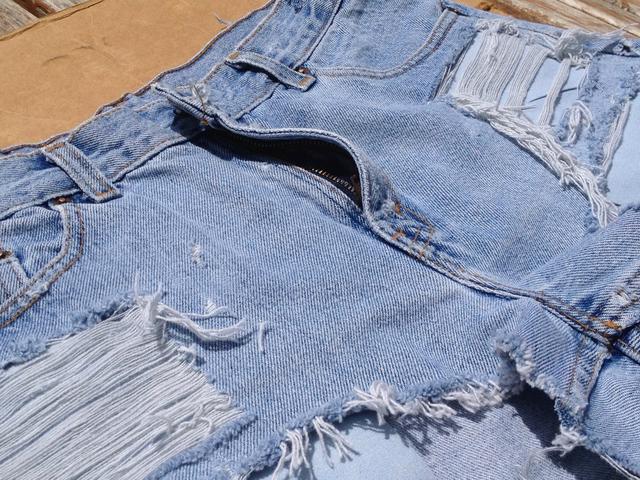
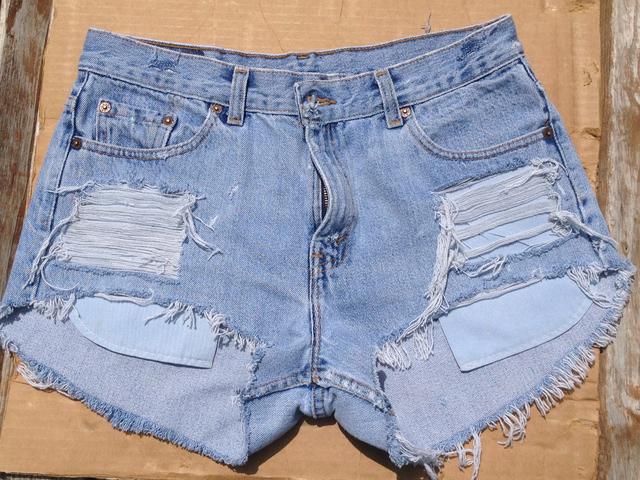
Wa-la! Your very own DIY High Waisted Shorts! If you want to get the hang of it first, try using a cheap pair you don’t care about! The process should take about 3 hours.
Tags: bikini cleanse, bikini ready, coachella, DIY, fashion, high waisted shorts, music festival fashion, weight loss Posted by